In SIGN8, a workflow is a signature process that includes at least one document and one recipient. This chapter describes how to create a new workflow without a template. If you would like to use a template, you can take a look at the following chapter.
General settings #
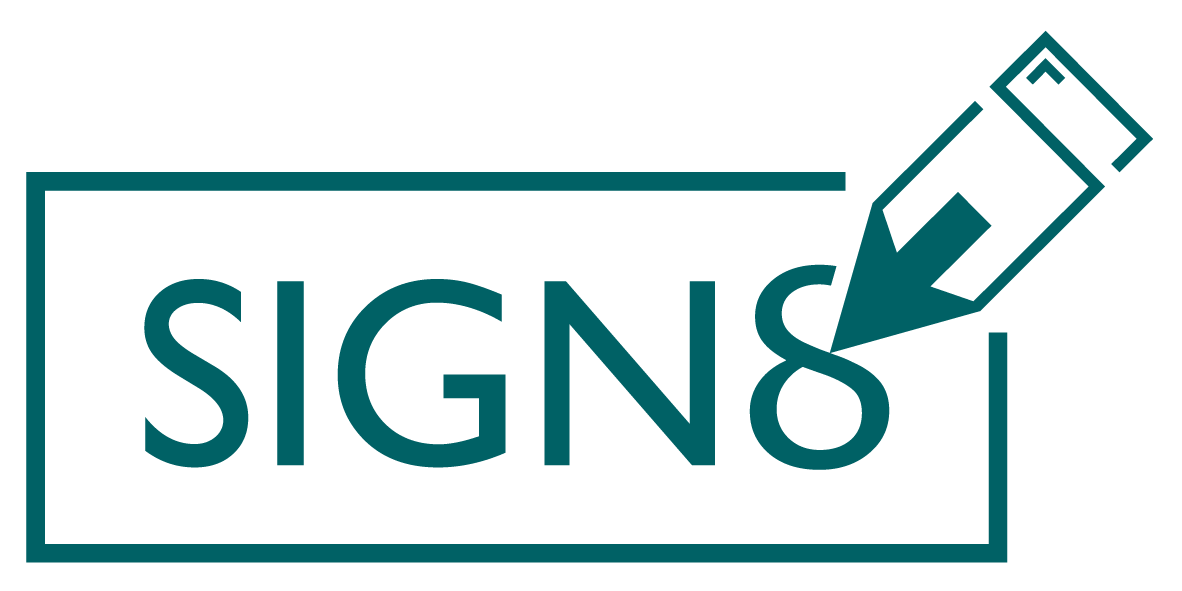
The creation of a workflow starts with general information about the signature process. There is only one mandatory entry, namely the name of the workflow. Additional fields are:
- Expiry date: The workflow must be signed by this date. If this is not the case, the workflow is considered “Expired” and has therefore not been successfully completed. No more signatures can be placed after the date has passed.
- Visibility: In the Visibility tab you can select a team. The functioning of teams is explained in the following chapter.
- Description: Optional text to describe the workflow. This text is displayed to the recipient during the signature process.
- Workflow Password: Additional password that recipients must enter before the signature process. If possible, transmit the password by another means than e-mail notification (e.g. via SMS, new e-mail, telephone).
Add receptionists #
In the next step, you must select at least one recipient to be part of the signature / sealing process. Here you can either access the contact book or create a new contact by clicking on the “+” symbol. For more information on contacts, see this chapter. Any number of recipients can be selected.

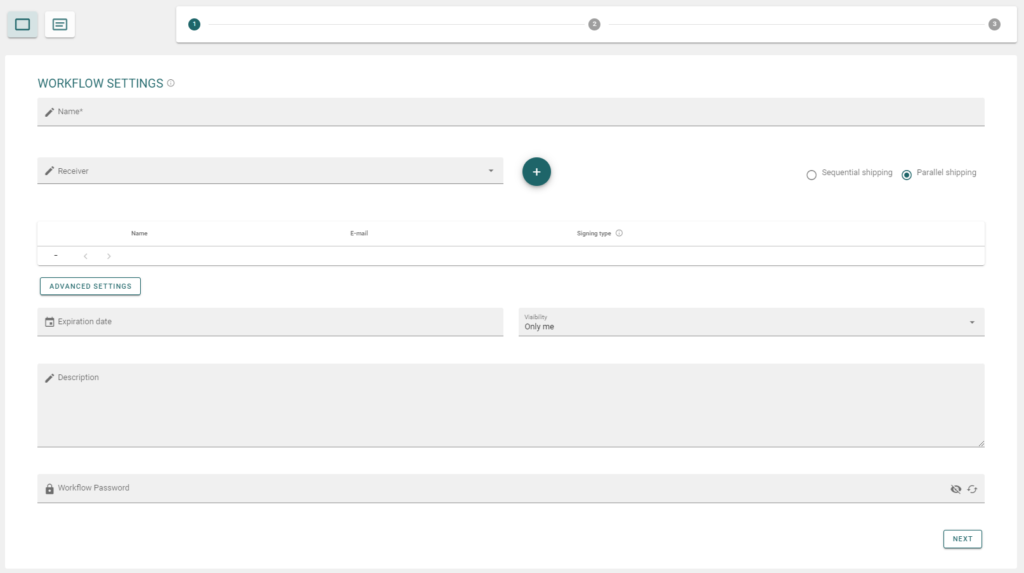
Sequential shipping #
With sequential dispatch, participants are invited to the workflow one after the other. On the left side of the table you will find an element with which you can change the position of the persons via drag & drop on the one hand, and information about the current position of the person on the other.
Parallel shipping #
In the case of parallel dispatch, all participants are invited at the same time. That is, there is no order in signing/sealing.
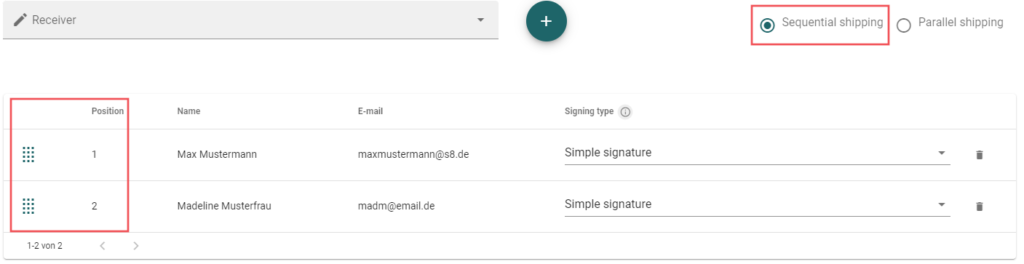
Signing type #
A signature type must be assigned to each recipient. This can be done in the respective table row in the right drop-down menu.
There are a few things to keep in mind here:
- A recipient has only one signature or seal level for this workflow.
- A recipient must sign or seal on at least one document.
- Advanced signatures are only available if a phone number is stored for the contact.
- Advanced seals are only available if the contact has a phone number on file and is part of a sealing team.
- Qualified signatures are only available if a telephone number is stored with the contact.
- Qualified seals are only available if the contact has a phone number on file and is part of a seal team.
Upload documents #
In the next step, you must upload the PDF documents that are to be signed. To do this, click on the button “Select document” or drag and drop the desired documents into the field.

A workflow must contain at least one document, but a signature does not have to be stored on every document. For example, you can also store attachments with a workflow.
Edit document #
You can edit the document by clicking on the pencil icon. This opens a new window:
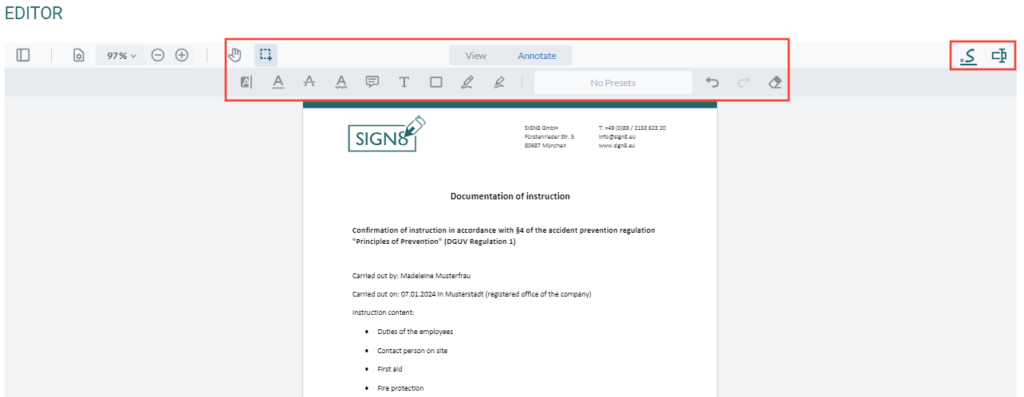
In the middle area of the window you can select various tools to edit your PDF file. Make sure, however, that the file is already signed or sealed. These may only be re-signed. If the file is changed in any other way, this destroys the existing signatures.
In the right corner of the editor you will see two buttons that provide special SIGN8 functions. Click on the “S” symbol to select a tool to place signature fields. With a click at the desired position, you can then select the corresponding person and then position the signature field as desired. Mit einem Klick auf die zweite Schaltfläche in der oberen rechten Ecke können Sie Eingabefelder auf dem Dokument platzieren, die die Empfänger ausfüllen können.
Save your changes by clicking on the “Save” button.
Summary #
In the last step you will receive a summary of your workflow. You can now change the standard text. Sie können die Dokumente erneut überprüfen, indem Sie auf das Auge unter der Registerkarte Dokumente klicken.

Now send the workflow to start the signature or sealing process.